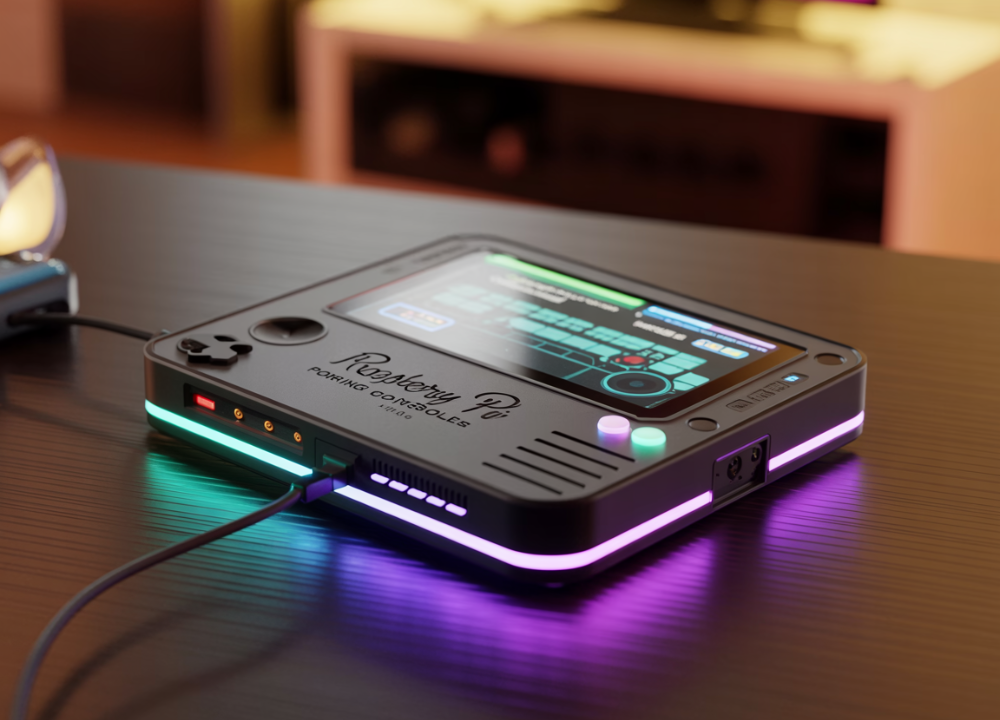
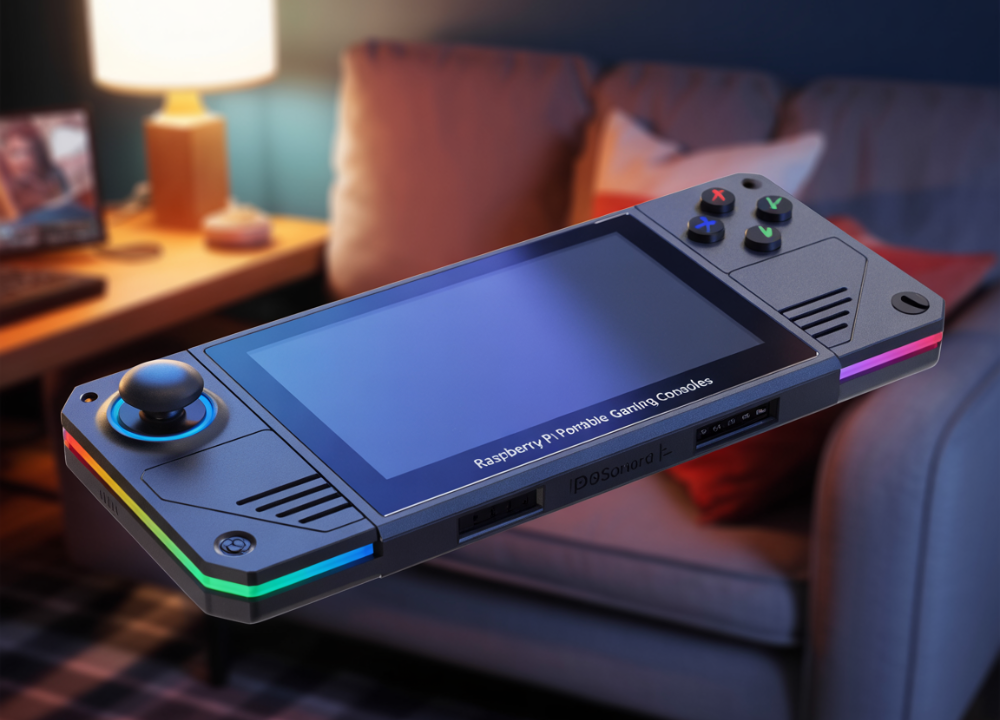
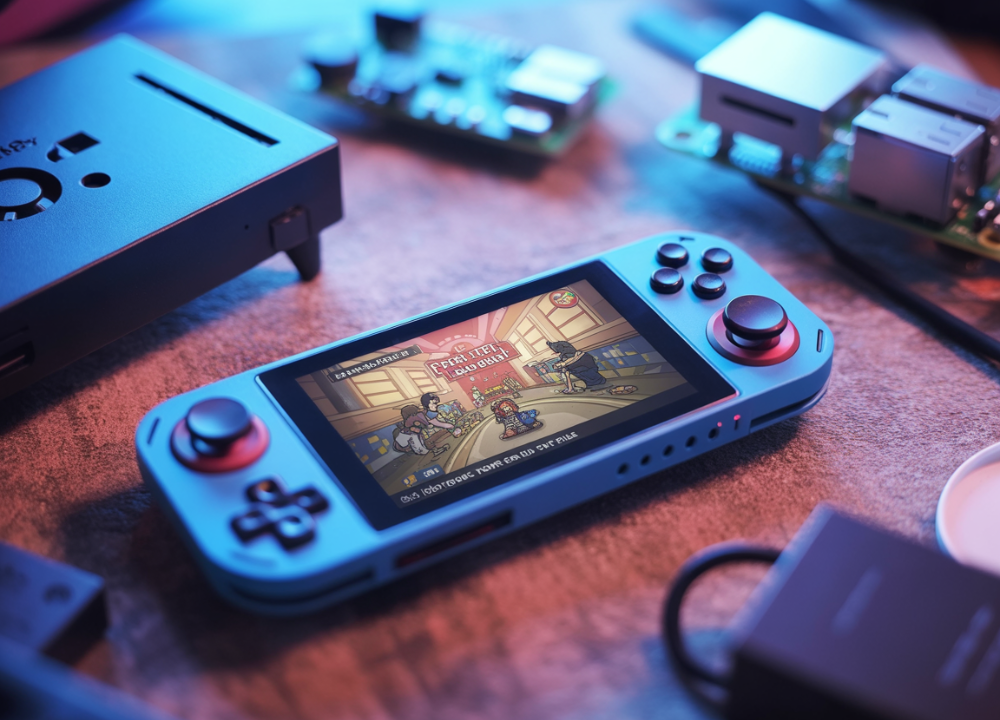
Building your gaming console might sound like a daunting project, but thanks to the Raspberry Pi, it’s more accessible than you might think. Raspberry Pi portable gaming consoles have skyrocketed in popularity, empowering gamers to create unique, customizable devices. Imagine playing all your favorite retro games on a device you built yourself. That’s the magic of Raspberry Pi in portable gaming.
This blog will explore what Raspberry Pi Portable is, why it’s a fantastic choice for gaming enthusiasts, and how you can create your very own portable console. Whether you’re a DIY hobbyist or a hardcore gamer, this guide is packed with insights and tips to get you started.
What is Raspberry Pi Portable?
Raspberry Pi is a small, affordable, and powerful computer board designed for educational and DIY purposes. Created to help teach computer science in schools, it has become a favorite tool for makers and hobbyists worldwide.
Capabilities of Raspberry Pi Portable:
- Compact and Portable: Small enough to fit in the palm of your hand.
- Multifunctional: Capable of running games, tutorials, coding projects, and even media servers.
- Affordable: Budget-friendly for creators of all experience levels.
- Highly Customizable: Add components such as touchscreens, batteries, and controllers to meet your project’s specific needs.
Raspberry Pi combines power with flexibility, making it the perfect foundation for a project like a portable gaming console.
Why Use Raspberry Pi for Gaming?
Raspberry Pi doesn’t just make it possible to build a gaming console; it makes it exciting. Here’s why it’s a top choice for gaming projects.
Low Cost and High Customization
With Raspberry Pi, there’s no need to break the bank. The baseboards are inexpensive, and you can decide how much or how little to add depending on your budget. The ability to customize ensures you have a device tailored to your gaming preferences.
Support for Retro Gaming
Want to relive the glory days of Super Mario Bros., Sonic the Hedgehog, or Pokémon? The Raspberry Pi supports RetroPie, a popular emulation software that allows you to play games from older consoles, such as the NES, SNES, Game Boy, and more.
Community Support
The Raspberry Pi community is massive. From detailed project guides to troubleshooting forums, help is never far away. You’ll find countless resources and tutorials for gaming-related projects.
Portability
By combining a Raspberry Pi with a compact screen, power supply, and controls, you can build a powerful gaming setup that fits in your backpack. Play anywhere, anytime.
Inspiring Raspberry Pi Portable Projects
Looking for inspiration? Check out these Raspberry Pi gaming console builds that have amazed the DIY community.
1. PALPi Retro Game Console
A compact and colorful handheld console built with a Raspberry Pi Zero. This project is perfect for creating an affordable retro gaming experience.
2. Pi0CKET-Tiny
Marketed as one of the smallest Raspberry Pi gaming devices, this tiny gadget proves that size doesn’t limit capability. Extremely portable and efficient for retro gaming fans.
3. RPi SNES Boy
This project combines a Raspberry Pi 3 with a retro SNES-style controller layout. With a 5-inch touchscreen, it’s an excellent console for classic gamers who love tactile buttons.
4. Raspberry Pi CM3L Single Board Handheld
For those who want a powerhouse portable console, this single-board design supports emulators for PS1, NDS, and PSP games, too.
5. RetroBerry
A Gameboy-style handheld made from a Raspberry Pi 2 inside a Gameboy shell. It’s a beautiful homage to classic gaming.
(For more ideas, check out detailed projects on Hackaday.io here.)
How to Get Started with Your Raspberry Pi Gaming Console
Step 1: Gather Your Tools and Components
You’ll need the following:
- Raspberry Pi board (e.g., Raspberry Pi 4 or Zero, based on your project needs)
- MicroSD card (with at least 32GB for games and RetroPie)
- A case for your console (optional, but it helps with portability)
- Screen (5”–7” touchscreen works great)
- Power source (portable battery)
- Controllers (USB, Bluetooth, or integrated)
- Software like RetroPie for emulation
Step 2: Install Software
Download and install RetroPie on your Raspberry Pi. Flash it onto your MicroSD card using a tool like Balena Etcher. RetroPie provides the software environment necessary to run retro games.
Step 3: Build the Hardware
- Connect Your Screen: Attach your chosen display to the Raspberry Pi via HDMI or GPIO pins.
- Add Power Supply: Hook up a portable battery or power bank for mobility.
- Attach Controls: Secure USB or Bluetooth controllers, or install custom buttons for an authentic experience.
- Encasing: Assemble your components inside a case for a professional finish and durability.
Step 4: Add Game ROMs
Transfer your legal game ROMs to RetroPie via USB or a storage card. RetroPie automatically organizes the games by console type.
Step 5: Start Gaming!
Power up your Raspberry Pi console and test your setup. Experiment with graphics settings, emulation options, and save states to enhance your experience.
Why Raspberry Pi is Revolutionizing Portable Gaming
Building a Raspberry Pi portable gaming console is more than a DIY project; it’s a gateway to creativity, nostalgia, and sheer joy. Whether reliving childhood classics or creating something innovative, Raspberry Pi helps you take gaming into your own hands.
With endless resources, affordability, and limitless customization options, Raspberry Pi Portable has cemented itself as an iconic tool for hobbyists and gamers alike.
If you’ve been inspired to start your gaming console project, now is the perfect time. Explore Raspberry Pi devices, gather the tools, and turn your gaming dreams into reality!

4 thoughts on “Raspberry Pi Portable Gaming Consoles ”